Are you looking to find clay in nature but don’t know where to start? Maybe you have spotted some clay on your walks or during time exploring and want to know how you can identify it? Or are you curious and want to know more?
Whatever the reason might be that brought you here, we have the answer for you!
Finding and processing your own clay is fun and incredibly satisfying, but it is surprising how many potters will walk past clay when they are outside and not even realize it is clay!
How many times have you walked past clay and not even realized it is clay?
So how can we identify clay while we are out and process it to be used?
When we head online with these questions, we are often met with little or conflicting information that leaves us quickly overwhelmed and confused, unsure where to turn or who to trust.
Suddenly, the dream of finding and using your own clay seems out of reach.
Well, no more! Today we are here with the answers that you need! Just keep reading to find out how you can find clay in nature and process it to be used!
We have a complete guide below so you don’t need to go anywhere else with your clay-related queries today.
How To Find Clay In Nature
Let’s get straight into it! Clay is pretty common everywhere, but often, we don’t know what clay looks like and simply overlook it rather than stop to examine it. Clay looks different too, depending on where it is found.
For example, clay on river banks that is damp will look different from hard clay found in dry deserts, and they are both different from the clay we are given to use at school!
Don’t worry, we will be walking you through what different types of clay look like, so once you have found it, you will know how to identify it.
But for now, let’s take a look at how you can physically find clay in nature.
You will first need to keep your eyes peeled, especially when you are hiking or driving in the countryside! You can’t find clay if you aren’t looking for it!
You will also want to take something to dig with like a garden trowel or mason’s hammer. We have found these to be the easiest tools to dig and get clay from the ground.
Make sure you have a bucket or zipper bag too that you can store your clay in once you have found it.
If you are using zipper bags, take some markers with you so you can write on the bag the date you have collected the clay and where from.
The more notes you make about the clay the better, so why not keep a small notebook and pen on you so you can jot down anything you need to remember!
Characteristics Of Clay – What You Might See
Now that we have established what you need to find clay, let’s look at some of the characteristics of clay.
By knowing these, you can recognize them when you are out and better identify clay in the wild!
Crackled Texture
Dry clay can often have a crackled texture as mud has at the bottom of a dry puddle. Clay like this has been settled in the puddle.
Clay is expansive, meaning it expands when it is wet and contracts when dry. This is how clay becomes crackled when it dries, as it has shrunk and broken apart.
Crackled texture like this is usually a good indicator that the soil has a high clay content and can be used for pottery! If you spot this out in the wild, be sure to bring some home with you!
Hard And Angular Chunks
Clay can also be found in hard and angular chunks when it is dry. These chunks won’t be as hard as rocks and will have a soft, soapy, or waxy texture when you touch them.
We tend to find these where underground clay beds have been exposed, usually by a stream cut bank or a road cut.
We can also find these angular chunks with dark patina on them, which is where they have been wet and dried over thousands of years as they pull in minerals from the water or other soil.
Chunks like this can’t often be used for pottery, but are interesting to see on your walks, and could be repurposed if you wanted to wet and mold them!
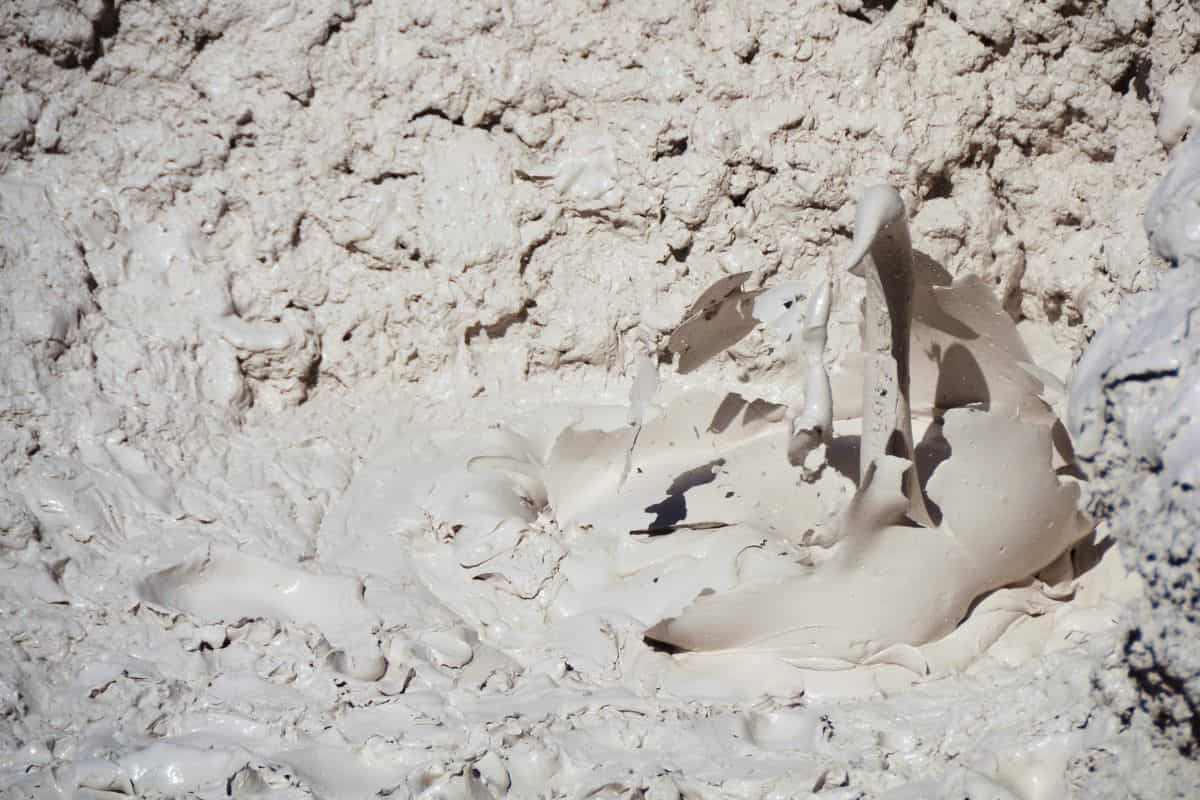
Soft And Plastic Texture
When clay is wet, it will have a soft and plastic consistency. This is the easiest type of clay to spot and identify, and will almost look like wet cement.
Often you will see wet clay on damp or wet ground, so be sure to take care when approaching or collecting it.
Some of the spots might be sticky too, so try and walk in other footprints or tire tracks that are already there!
We can use footprints or deep tire tracks too on dry ground to see where wet clay might have previously been.
Field Testing Clay
Once you have found some clay that you want to use, it is time to test it! The first thing to do to see if it is indeed clay you have found is to test its plasticity. We do this by wetting the clay if it is already dry.
Most of the time this is easy to do, simply pour some water over the clay in your hands and start to knead it.
It might take a few minutes of kneading, or some more water for the clay to become the right texture.
This is usually a case of trial and error as each piece of clay will be at a different dryness level and need different amounts of water and kneading to become the right consistency.
You should be able to roll the clay into a little coil in your hand and wrap the coil around your finger. If you can do this, then you have the right plasticity and can proceed with your clay.
If the clay cracks while you are trying to do this, then it lacks plasticity and might need more water or kneading.
Similarly, if the clay bends around your finger easily, then it might have too much plasticity and will need to dry out slightly.
In some cases, the clay you have selected is just not good clay and won’t play ball here. That is fine, it is all part of the clay finding process. Some days you will find good clay and others you won’t.
The trick is not to get discouraged from this and to learn from every piece of clay. That way you can identify good clay quickly and save yourself time working with tough clay!
Processing Wild Clay
Once you have found clay with a good level of plasticity, you will want to work it into a lump that you can use to make something.
Often, this is the best way to know if the clay is suitable for your task and worth using. We have found the best way to do this is to dry process the clay.
If you have never done this before, then keep reading. We have some instructions that you can follow below.
Dry Processing Natural Clay
To start, you will want your clay to be dry. If it still feels a little damp, then leave it to sit outside in a dry area that has not had any rain for a few days.
You can also place it on a cookie sheet in your oven at a low temperature for a few hours to dry if you prefer.
As your oven will be on low heat, there is very little chance here that you will accidentally fire your clay! Even at its hottest temperature, an oven isn’t always capable of turning clay into ceramics.
Once the clay is dry, you will need to grind it up. To do this take your clay and use a hammer or large rock to pound it on a driveway or cement patio.
You want the clay to be as fine as sand, so this may take a few minutes for you to do, depending on the current consistency of your clay.
Next, add roughly 20% sand and mix it thoroughly with your clay. By adding sand, we can make the clay more porous, allowing moisture to escape easily and preventing any cracking when we fire the clay.
You can get your 20% sand by using a ratio of 4:1, with four parts clay and one part sand mixed together.
This ratio does vary depending on the clay you have, but 20% is a good average to work with. You can experiment with this as you see fit to find the right ratio that works for you!
To finish, we will want to add water to our clay. Be sure to add water in small amounts, kneading the clay after each time to mix the water thoroughly.
You will want your clay to have a plastic consistency, which can be tricky to achieve. Don’t worry, for most potters, the first few times you do this will be a case of trial and error.
How much water and kneading you need will also depend on the type of clay you have, so feel free to experiment until you find the right amount.
If you have added too much water, your clay will feel sticky and gloopy, whereas too little and your clay will feel overly firm and crack easily. You want your wet clay to sit somewhere in the middle!
What To Do Next
Next, you can mold and shape your clay as you see fit! You can use this clay to make a sculpture, dish, mug, or anything that you want! Once the shape is how you want it, you can move on to firing your clay.
We recommend that you start with a low temperature and work your way up. Place your clay in a bowl or on a tile that you have previously fired in the kiln and you know can handle the temperature.
This helps to avoid any mess in your kiln, saving you time cleaning up later!
If you don’t want to use a kiln, there are other ways you can fire clay, such as making your own kiln, using a fire pit, or your home oven.
All of these methods will be a case of trial and error to find the right temperature to fire your kiln, so remember to be patient if you do this!
It is better that it takes longer on a lower temperature than when you use too hot a temperature and end up cracking your clay!
Final Thoughts
So there you have it, a complete guide that will help you find clay in the wild!
Make sure that you have the equipment you need to collect your clay and follow our instructions to help you identify the clay and mold it into something that can be used.
With these steps, you might never need to pay for clay again!